Splash screens are designed to encourage users to engage with the HRA. There are multiple options available for creating effective Splash Screens within the HRA’s customization.
Customize your Splash Screen
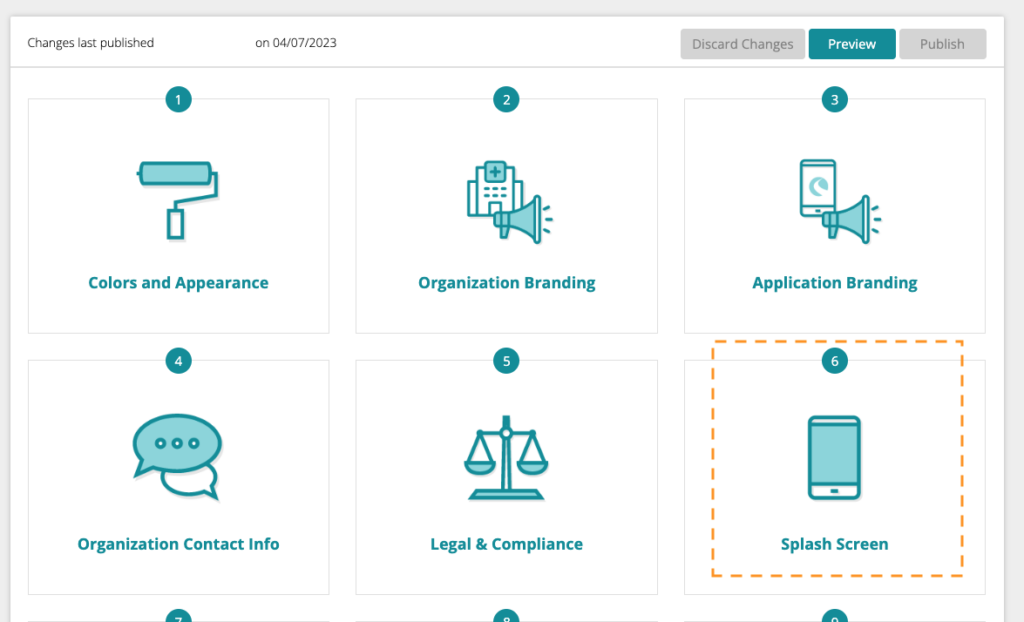
From the dashboard, navigate to your HRA’s module and click Customize HRA. Next, select the Splash Screen tile.

The Splash Screen customization section has multiple customization options to create a one-of-a-kind Splash Screen for your HRAs. As you make your selections, the sample image updates to display how your Splash Screen will appear. You can also click the Preview button on the main Customization page to see your saved changes.
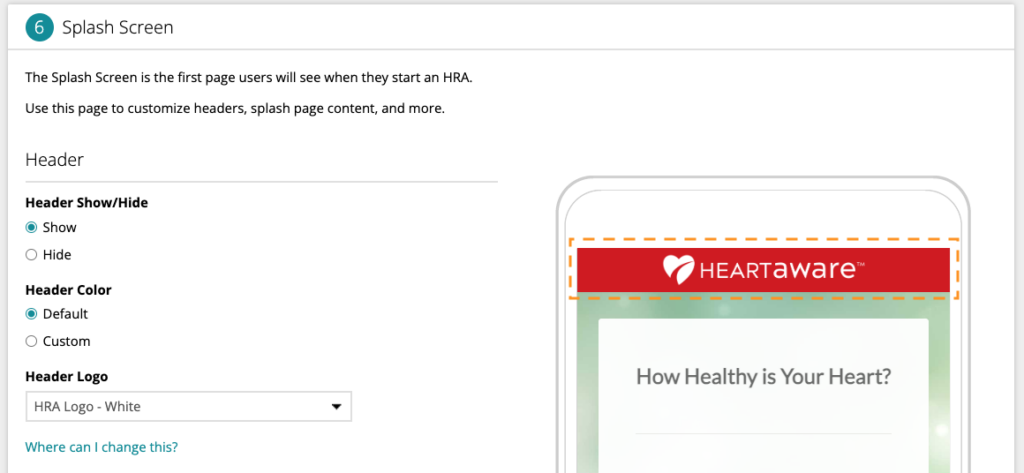
Header
In this section you can choose to show or hide the header, change the header color, and the Header logo (typically the HRA logo: e.g., HeartAware).
Note: You can change which application logos appear in the dropdown in the Application Branding section.

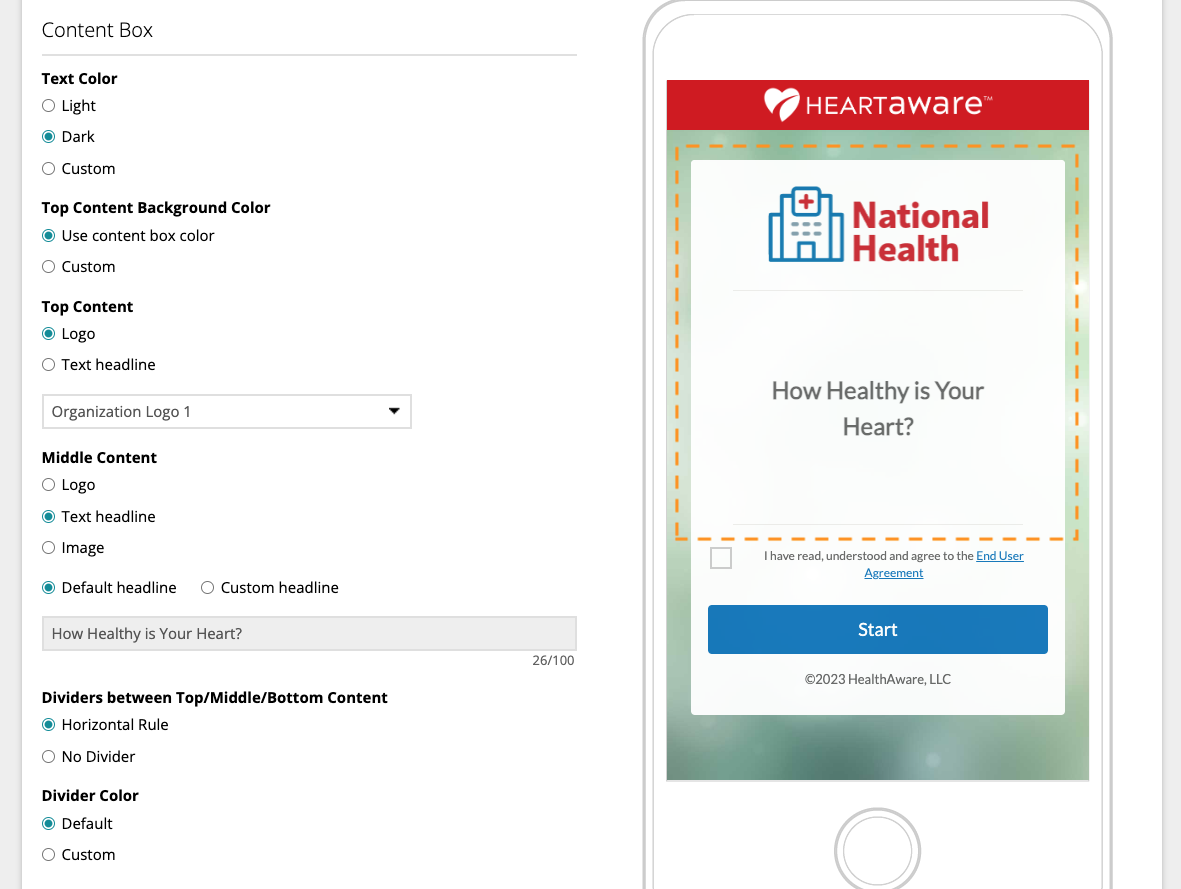
Content Box
The Content Box area of the Splash Screen provides maximum flexibility to suit all your branding needs.
Within the box top and middle content areas, you can customize the text that appears on the content box. You also have the option to use your logo or place a custom image in place of the text.
Lastly, you can change the dividers that show between the content areas of the box – or remove the dividers entirely.
Note: Default color, transparency and position of the content box are set up in the Colors and Appearance section. Background images/colors are selected in the Application Branding section. Splash Screens use the same settings.

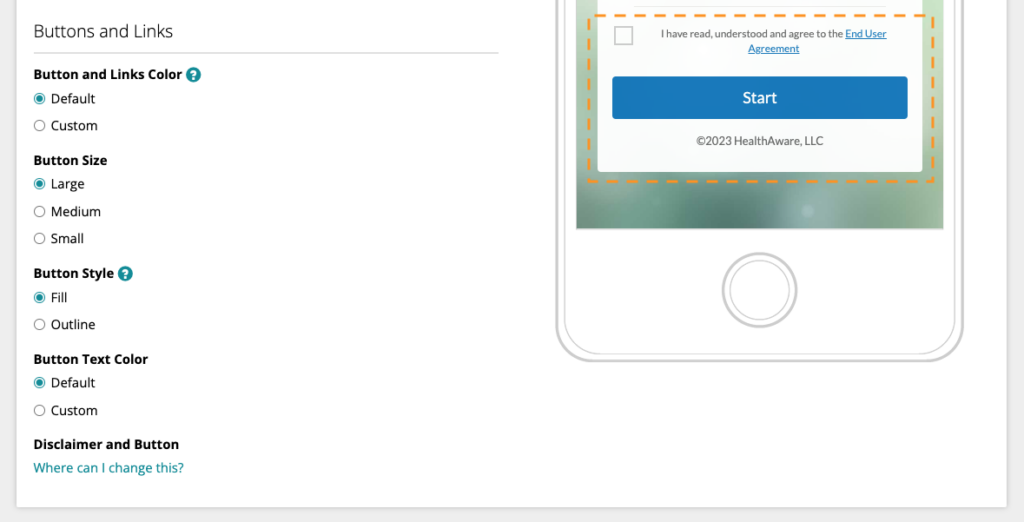
Buttons and Links
The bottom third of the content box contains the Start button and links to the disclaimer.
In this section you can select the color of the button and links, the button size and style and the button text color.
Note: You can change the button label text and disclaimer link text in the Legal & Compliance section. The default color is the Primary Interface Color selected in the Colors and Appearance section. Custom colors can be chosen by entering the color hex code for each element (for example: #FF0000 is red).

When you are finished, click the Save Changes button. Click Publish to make your changes live.
Utilizing the many options for the Splash Screen can help you create a unique look and feel to your HRAs. The possibilities to differentiate and emphasize your brand are endless.
To learn more about how you can customize your HRAs to make the highest impact, call or email your client success representative.
Learn more about HRA Customization…
Learn more about Corporate Override for Customizations…

