Once you have created your Calls To Action, you are ready to add them to your HRA’s follow-up plan.
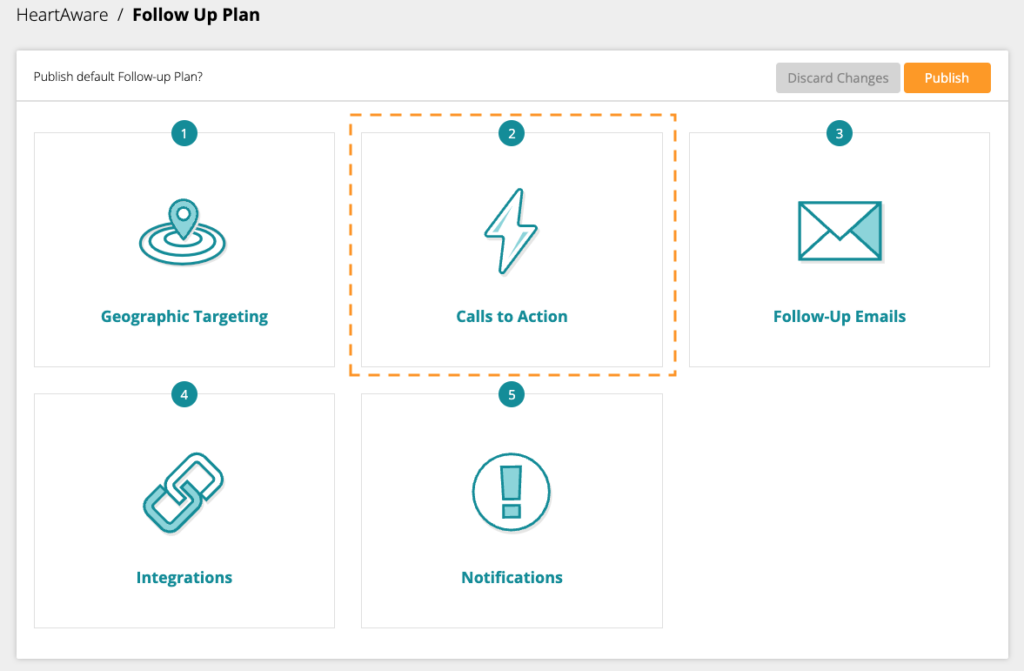
From the dashboard, navigate to your HRA’s module and click Create Follow-up Plan. Next, select the Calls to Action tile.
Note: HRAs that have not yet been customized will need to complete that step before you can create a follow-up plan.
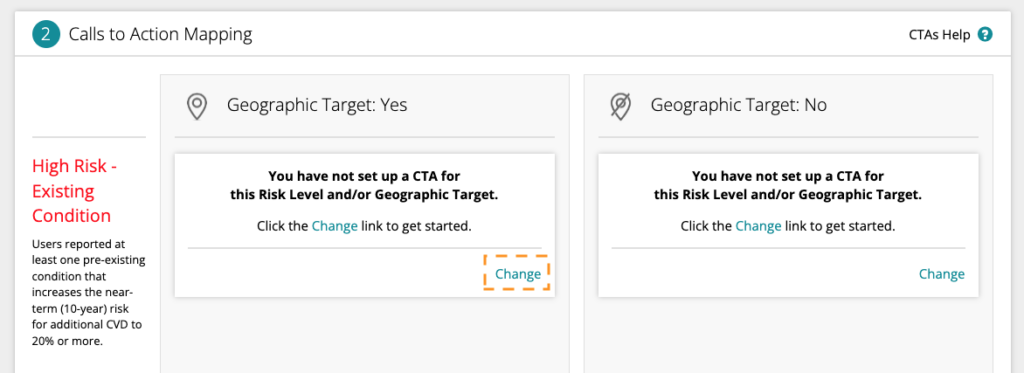
Calls to Action Mapping
Call To Action (CTA) for your app are customizable within the Mapping matrix. CTAs are divided up between Primary Result (left column) and Geographic Targeting status (top row). By default, Geographic Target is set to None. You can add Geographic Targets in the Geographic Targeting section of your Follow-Up plan. When you enable this feature, you will see the following matrix:

Setting up Primary Result CTAs
Select which CTA you’d like to customize. Navigate to the lower right corner of that CTA and click Change. Then click +Add CTA.
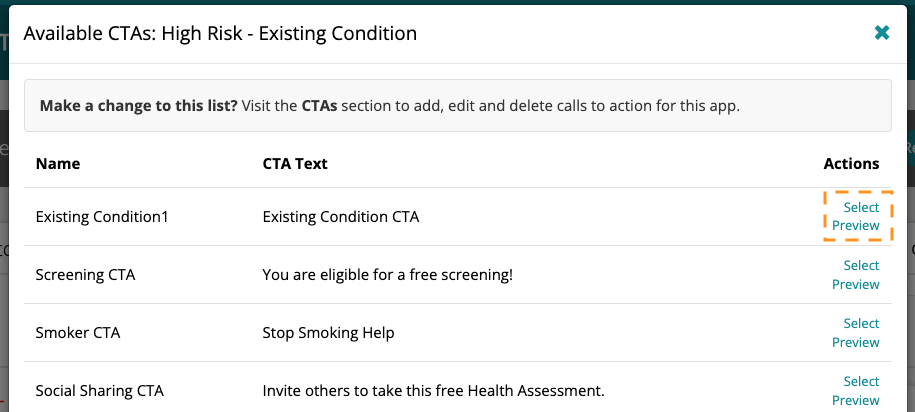
A window will appear displaying all of your existing CTAs available for the HRA type. (CTA content and availability is configured within the CTA section of Portal).
Click Select for the CTA you wish to use. The CTA will appear in the matrix. Click Save in the lower right corner to save your changes. Make additional changes any time by clicking Change again.
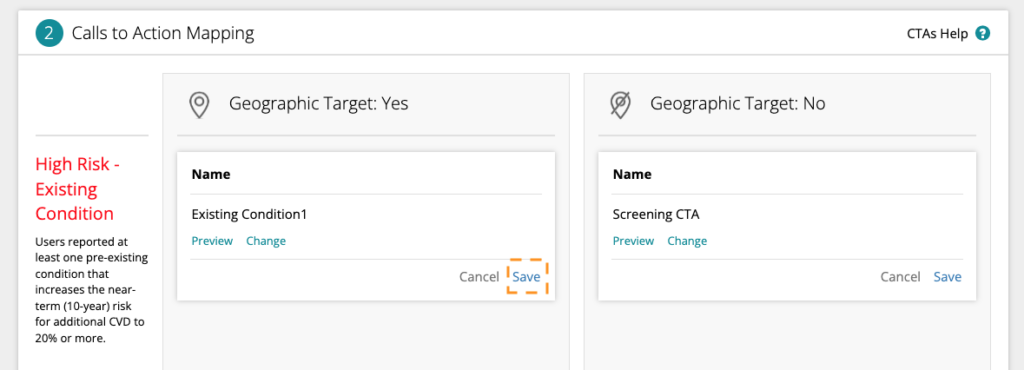
Click Return to Plan button when finished. Click Publish button to make your changes live.
Additional Calls to Action
After the Primary Result CTA, the Results page can display up to 2 more CTAs based on any data point used within the HRA. For example, tobacco use or diabetes status.
How to Add and Configure Additional CTAs
Click the + Add CTA button to create a new CTA. A modal window will open where you can configure your CTA with additional criteria.

- First, select the data point you want to use from the dropdown. You will only be able to see data points that have a CTA associated with it. Visit the Calls To Action section to create CTAs.
- Next, select the values for the data point to filter which users will see the CTA. For example, for current tobacco users only, select ‘current.’
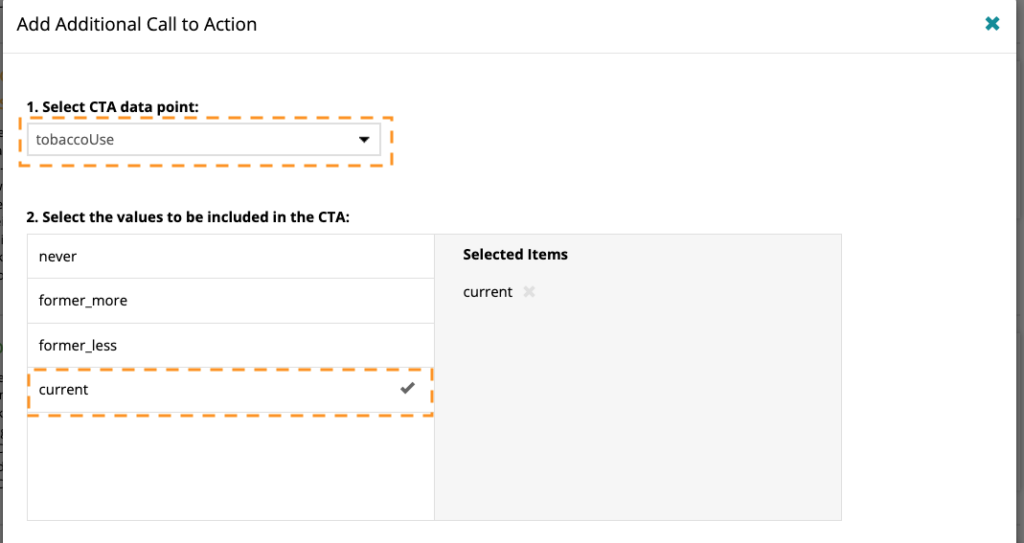
- If you would like to further filter your CTA criteria, you can also select Primary Result and Geographic Target status.
- Lastly, preview and select the CTA you want to display for this set of criteria. Every CTA you’ve created for the specific data point will show in the table.

When you’ve finished modifying your CTA, navigate again to the bottom right corner and click Save.
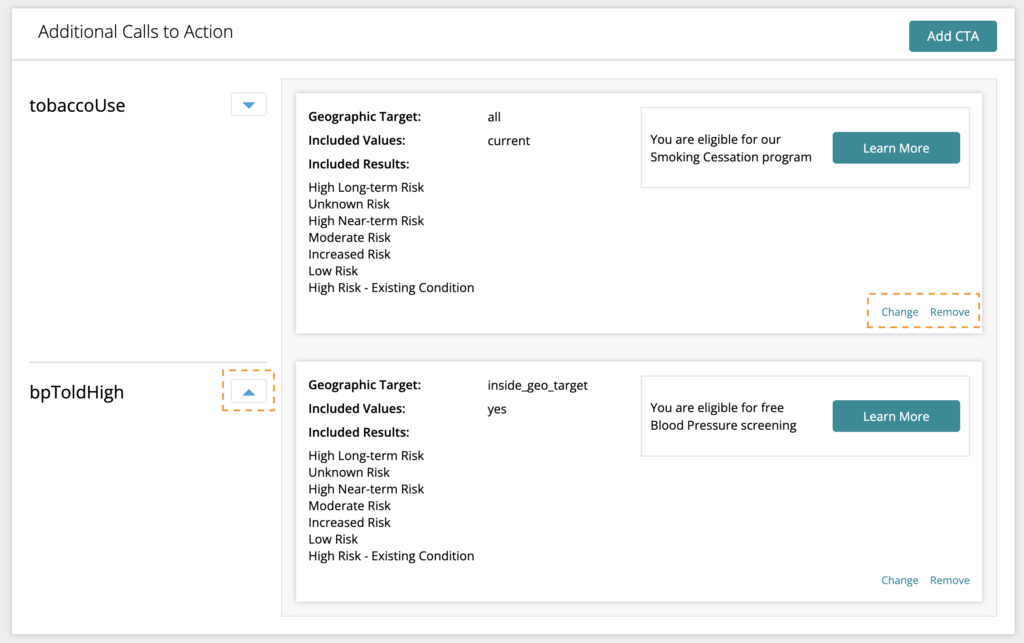
You may set up as many additional CTAs as you want and prioritize the order they appear in when the criteria is met by a user. Each user will only see a maximum of 2 Additional CTAs below the Primary Result CTA. To change the priority order, click the up or down arrows next to each CTA.
To edit an existing CTA, click the Change link. To remove a CTA from the module, click the Remove link.
Note: removing an Additional CTA cannot be undone.
Click Return to Plan button when finished. Click Publish button to make your changes live.
Learn more about Follow-up Plans…
Learn how to manage CTA content and availability…
Learn how to map and schedule Follow-Up Emails…
Learn how to manage Follow-Up Email content and availability…

